Friday, 23 April 2010

Girly Skirts - Again!

Yes, another one! I just love them!

This one I called the "Polka Skirt".
Polka dots on the pockets and enough twirl for a dance and a run!


Polka Skirt


This time with pockets. Reinforced pockets.

Or where would the little girls keep the little treasures they find? Little stones, little acorns, little leaves....


Have a happy weekend!

Monday, 19 April 2010

More Girly Skirts!

The sun is shining and it's getting warmer!
Perfect for more Girly Skirts!

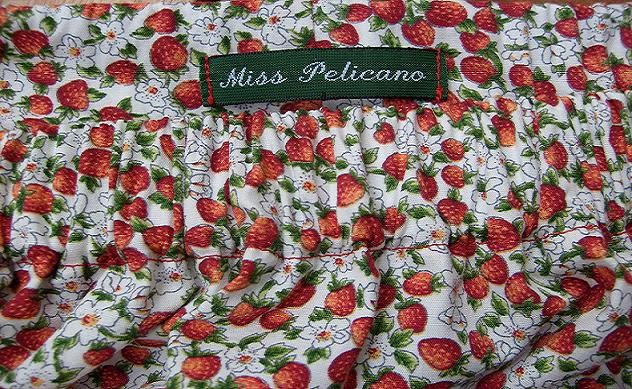
So I made this one with lots of wild strawberries for a little friend of my younger son who's just turning 4!
She lives in the area where the old Swedish film studios used to be. Greta Garbo, Ingrid Bergman, Ingmar Bergman, and many others, walked on those streets! They've turned it into a residential area with a cinema for commercial films, but all over they've planted wild strawberries!


I called the skirt "Smultronstället".
The literal translation would be "Wild Strawberry Place".


Ingmar Bergman made a beautiful film called "Smultronstället", which got the name "Wild Strawberries" in English. The special thing about the Swedish expression is that it doesn't really mean the Place where the wild strawberries grow. It means any place which is extra special to you. A dear place which you always want to go back to.
Which is your "Smultronstället"?


So much in a little skirt!

Monday, 12 April 2010

Easy Grocery Bag

I love big bags.
I don't like plastic bags. Not only for their environmental unfriendliness but also because I really think they are so unelegant and impersonal. If plastic bags were the the environmentally friendly way to go I would really have to push myself to follow that....

I had been looking for a pattern for a good size shopping bag and Keyka Lou had the perfect one!

It's the Easy Grocery Bag.


 Outer fabric from Åhléns and lining from Ikea.


The topstiching over the handles recommended in the pattern adds strength and is a beautiful detail.
I used contrasting thread. A bright green adds colour to the grey.

And the new labels:
Miss Pe...
 ...licano!

The Easy Grocery Bag is really easy to sew and it has great curvy handles!
This is really one of my favourite patterns for totes now!
I made it for a friend as a Birthday present.

Thursday, 8 April 2010

First things first!

So, I'm back! I think!

I've been immersed in a nightmare of a maths course since January and literally drowning in numbers, formulas and other mathematical stuff which I just want to forget. I am slowly waking from that very bad dream - which unfortunately was very real! -  and although I've started new courses, these will be like a gentle summer breeze! I'm now taking two courses on Second Language Acquisition which is very interesting as I am billingual, learnt Swedish as an adult and have two trillingual children and have always worked with multilingual children! Fun!
It's been impossible to sew or blog but everyday I looked at my fabrics and planned what to do with them. I opened them and felt them. Then put them back.
I also thought I would stop blogging. I know many bloggers go through this phase. But once in a while I got a kind e-mail, or a comment, or a parcel in the post, from fellow crafters/bloggers which really gave me lots of warmth and encouragement! I never stopped visiting all the fun blogs that inspire me - yes, you all! And it's just incredible how much you all are doing and how much that has lightened my days! Thank you all!

A while back I got a completely unexpected parcel in the post from Baukje. Baukje joined my Help Haiti Fabric Auction and has a lovely blog about knitting, sewing and about her daily life!

A lovely letter - check out the cat in the hay! A lovely vintage ribbon and some useful buttons!
Thank you so much!

I will be posting a couple of things and I hope you pop in to see them! 

Tuesday, 9 February 2010

Snow Buds


When our friends M & D got married last year M asked me if I could sew the dresses for their two little girls.
Of course I could! When, otherwise, would I get the chance to be submerged in pink and roses? I loved it!


The basic pattern is the same one I had made and used for the Polka Dot Summery Top
Only here I made a longer dress version of the same size, and a smaller version for the smaller dress.
M suggested the design with the ribbons and roses.


Thursday, 4 February 2010

Cotton Reel Rack - Tutorial!

I've always wanted to have a cotton reel rack.

During one of my teaching practice occasions I got talking to the woodwork teacher at the local school where I'm based as a student teacher. I asked for advice on a quick and easy solution to store my cotton reels. And then she said I could just go down to her workshop and make a rack. I thought she was joking, but here it is! She gave me the materials and the scary drill, started me off and.....


now I have one!

Thanks S.!

It really was quite easy, after she explained how to hold the drill at a 45 degree angle, approx. Now I feel I could make another one all by myself.

Here is a quick (maybe not very thorough) tutorial:

All you need is:
  • a piece of wood, the size you want, depending on how many reels you want to store on it
  • Some wooden sticks that fit through the whole on the cotton reel. If you have a long stick you can easily saw it to the right length(approx. 6 cm long and 4 mm wide)
  • ruler
  • pencil
  • a small hand drill
  • wood glue
  • paint (optional)
All this you can probably get at your local warehouse. Here we've got Bauhaus, for example. There you can find everything you need for this project and you can even borrow the saw on the spot to get the wooden board the right size and rent a drill.

Measure up with a ruler and mark with a pencil where you will be drilling the wholes. Make sure they are evenly spread out and that the distance is big enough to fit the reels beside each other. Mine are 3 cm apart, horizontally and 5 cm apart, vertically. I can fit both small and big reels.

Place the wooden board on a flat surface (with a pice of waste wood underneath to protect the surface), or use a workbench.
Place the drill (make sure it's the same measurement as the stick - your warehouse will help you with this, or you can even do it yourself) on the pencil marks and hold it at a 45 degree angle approx. so you get the sticks slanted.
Drill firmly but carefully approx. 1 cm into the wood. You can measure 1 cm from the drill end and put a bit of tape there just so you know when to stop (when the tape touches the wood).

Dip an end of the sticks in the wood glue and push them in through the wholes. Wipe off excess glue.

Let dry. How long, really depens on the glue. Mine needed approx. 30 minutes to be ready for painting.

Paint.

Done!

The measurements of my cotton reel rack are: 30 cm x 14 cm x 1,5cm.

At least 1,5 cm in width is advisable so you can really make sure the little sticks are properly fixed, although you need some wood glue anyway, before you put them in the wholes, just to make it more secure.

Be careful not to drill right through the wood. If you happen to do that it's really not a big problem. It just means that you have to make sure the stick doen't pop out the back when you glue it in. I drilled once right through, but as it's on the back you don't notice it.

It's really quite easy! If you want to attempt to make one and you find this tutorial a bit confusing, don't hesitate to ask me!
Wednesday, 3 February 2010

Donation to Doctors Without Borders

 Baujke, from BusyBeeFree has donated 25 euros to Doctors Without Borders in response to the fabric auction I held on my blog last month, on this post.


Thank you Baujke for participating! And I hope you enjoy the fabric!